Setting Up a Vena Template
In this guide, we show how to create a template in Vena, to send data to Vena with the Import API
Introduction
Before you can send data to Vena with the Import API, you need to configure your Vena template to accept the incoming data. As you can see in the API Reference, some endpoints such as the Start with Data and Start with File endpoints in the Import API require the templateId parameter. In this guide, we show the following:
- How to correctly create and configure the templates
- Where to find the templateId
Before you begin
To follow the instructions in this article, you will need at least Modeler access.
How to
Step 1: Set up a Vena Table to accommodate API data
- Navigate to the Modeler tab.
- Select Data Transformations from the sidebar.
- Select Channels from the sidebar tab.
- Select Create from the upper right-hand corner of the screen.
- Select Vena Table from the drop-down menu.
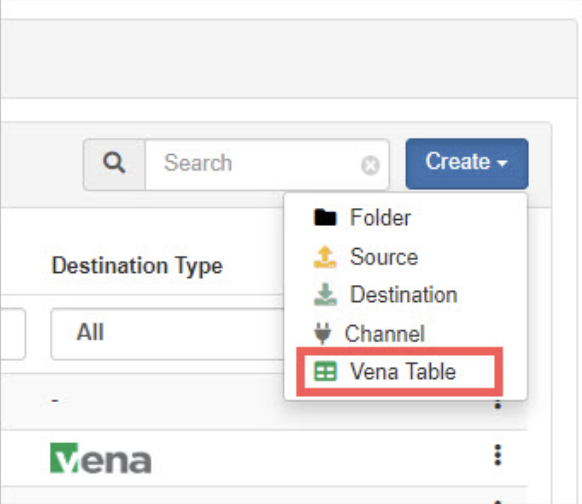
Select Vena Table from the drop-down menu
- In the Create Vena Table drawer, follow the prompts to create your new Vena Table:
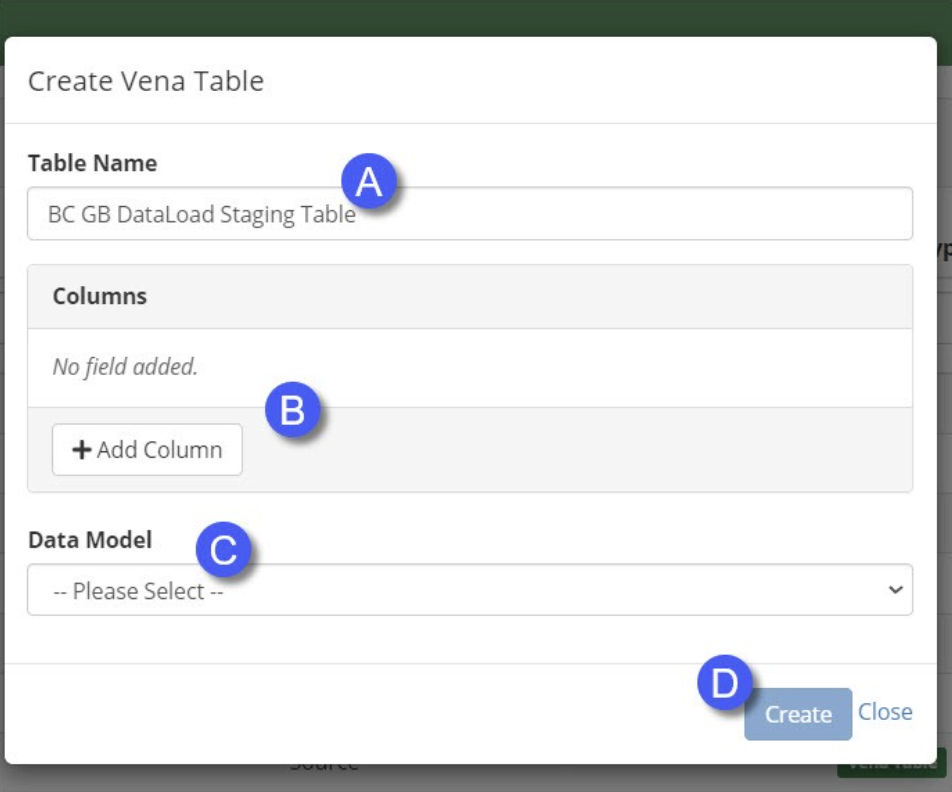
A Enter unique column names for each column (may contain letters and numerals). Please note that leading and trailing whitespaces are not allowed in the column names.
B The number of columns must match the data being uploaded via the API
C You must assign a data model to each unique Vena Table to segregate data models. In this way, you will only be able to view this Vena Table if you have the appropriate permissions for the affiliated data model.
D Select Create when finished creating your Vena Table.
- The new Vena Table will appear on your Channels page:
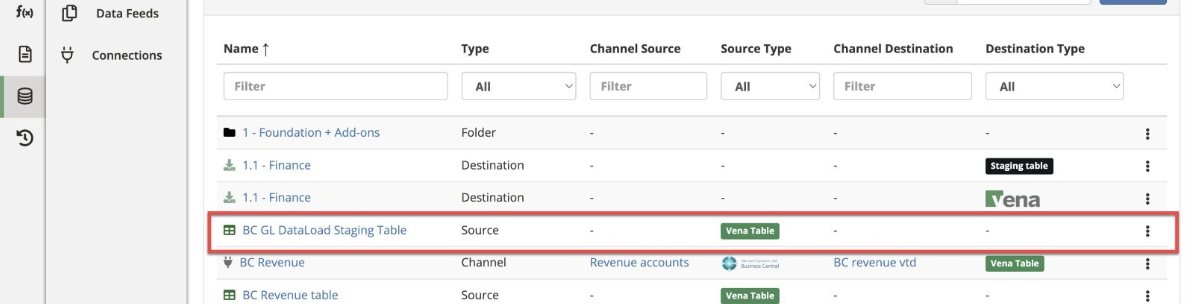
The Vena Table will appears on your Channels page
In the next step, you’ll use your Vena Table to build an ETL template.
Step 2: Create an ETL Template for File to Vena Table
- Navigate to the Modeler tab.
- Select Data Modeler from the sidebar.
- Select ETL from the sidebar tab. By default, you should be in the Templates section of the ETL tool, which lists your existing ETL templates.
- Select + Create Template.
- Enter a name for the ETL Template.
- Select Add Step.
- Select File to Vena Table from the drop-down menu.
- Select Save.
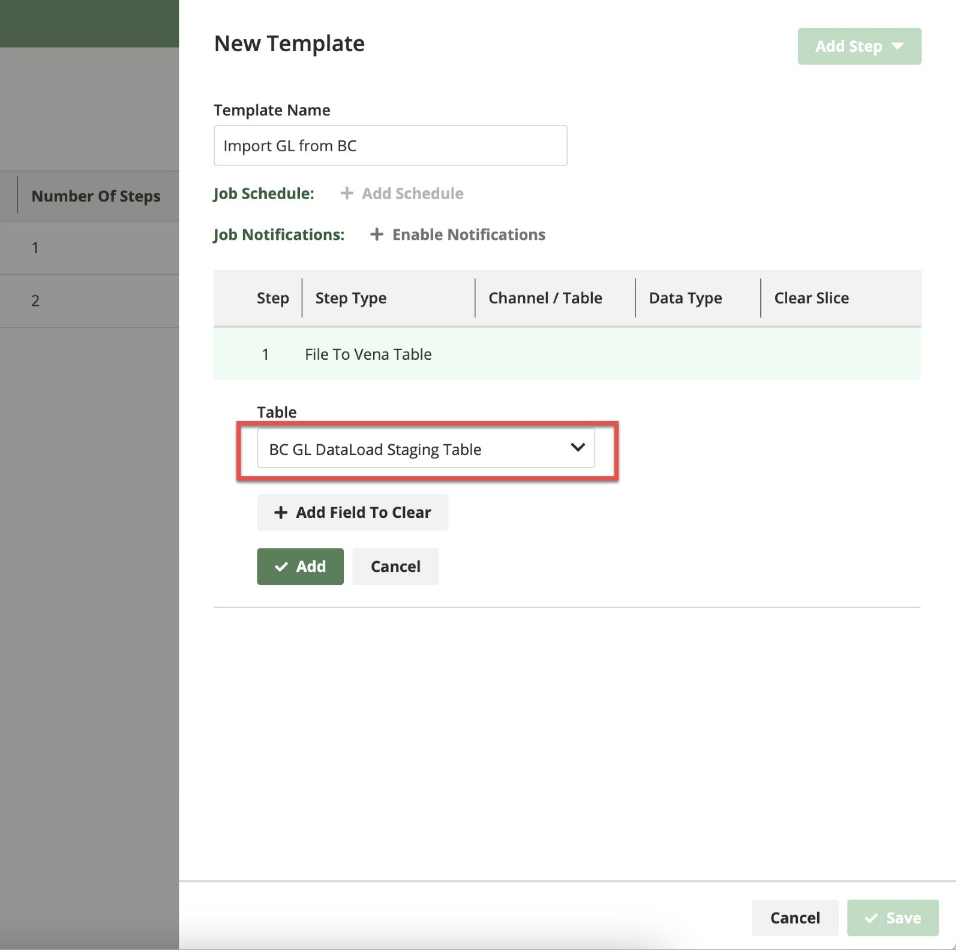
Add the File to Vena Table step
Step 3: Locate your template ID for the Import API
- Locate your new ETL template on the ETL Template page.
- Select the vertical ellipses at the end of the row and select View/Edit Details from the menu.
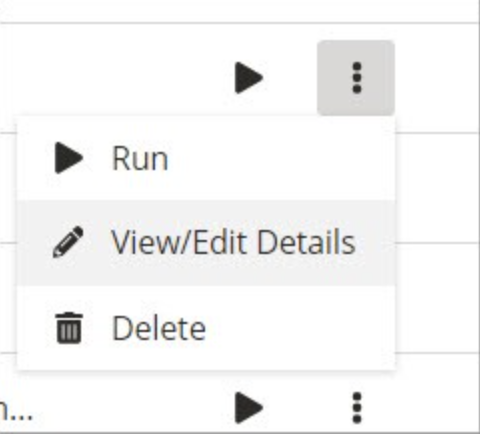
Select View/Edit Details
- Locate your ID and copy it (CTRL+C).
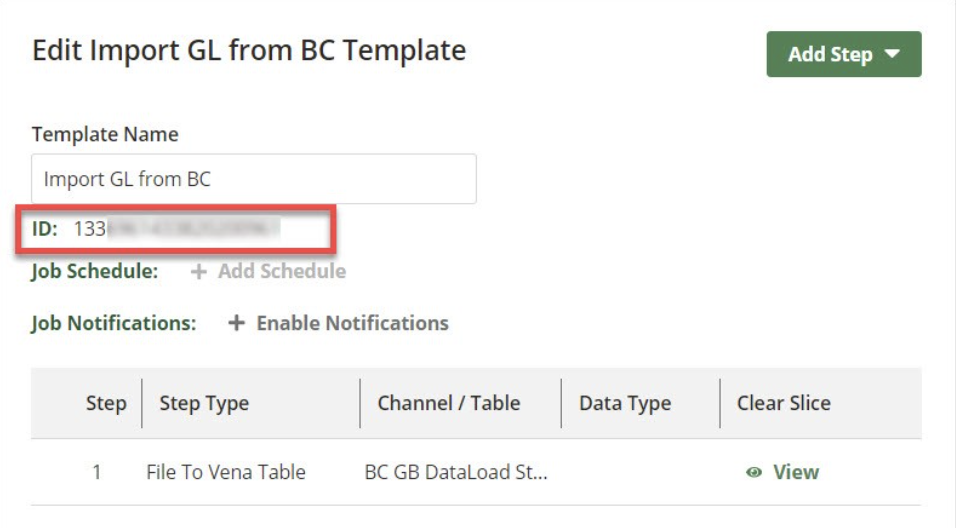
Copy the ID to use it for the templateId parameter in certain Import API endpoints
You can now input the template ID into the templateId parameter for endpoints such as the Start With File and Start With Data endpoints, to send data to Vena.