Connect External AI Systems
Get Vena MCP Server URL
To complete the steps below, you must have the Vena MCP Server URL. This action requires Admin permissions in Vena.
-
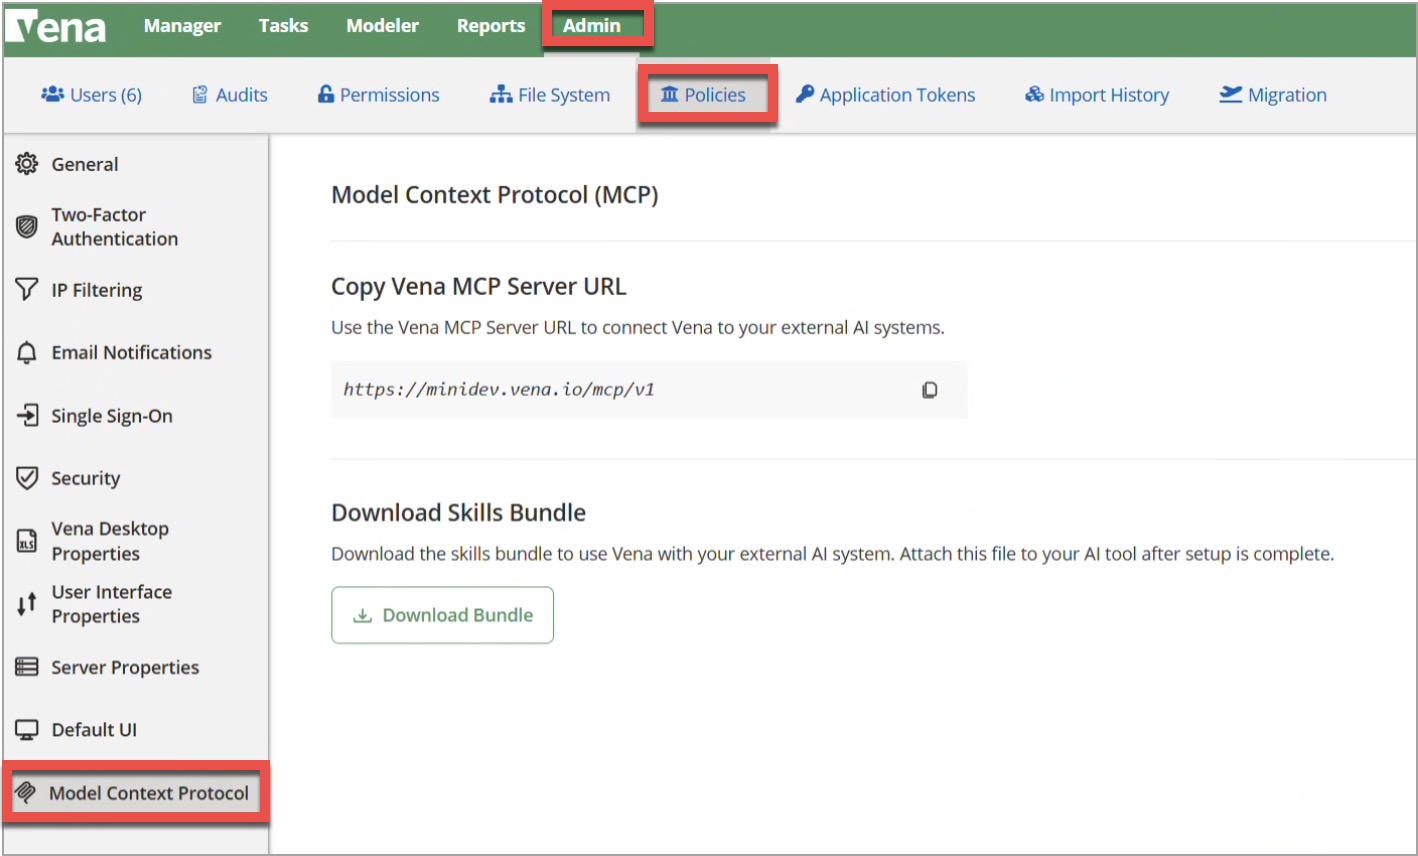
Log in to Vena and navigate to the Admin tab.
-
Select Policies, then Model Context Protocol from the sidebar.
-
Select the Copy icon to copy the Vena MCP Server URL.
-
Download the skills bundle if your AI system supports it.
Note: If your organization has SSO enabled, you must assign the users of the MCP a Vena password before they can connect to the MCP. This Vena password is used in place of SSO credentials for MCP authentication.
Claude
Create Connector (Admin or Owner Only)
To create a connector, you must have Admin or Owner permissions.
Create the Connector
-
Navigate to the Claude web interface.
-
Select your profile icon.
-
Select Organization settings, then Connectors.
-
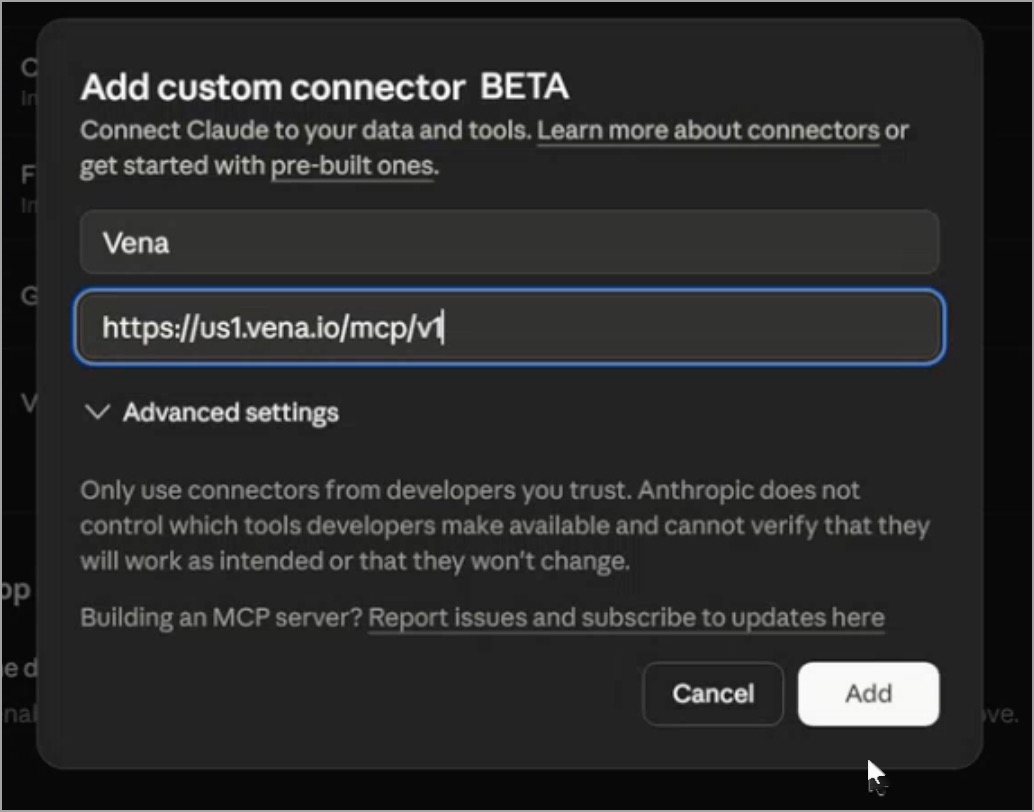
Select Add → Custom → Web.

-
Enter a name for your connector.
-
Paste the Vena MCP Server URL you copied from the Vena Admin tab into the Remote MCP server URL field.
-
Leave Advanced settings empty.
-
Select Add.
Allow Vena Domain (Owner Only)
As an Owner, you must add Vena to your allowed domain list.
-
Select your profile icon, then Settings.
-
Select Capabilities.
-
In the Code execution section, ensure the following are turned ON:
- Code execution and file creation
- Allow network access
-
Under Domain allowlist, choose the appropriate access level.
-
In Additional allowed domains, enter:
*.vena.ioSelect Add.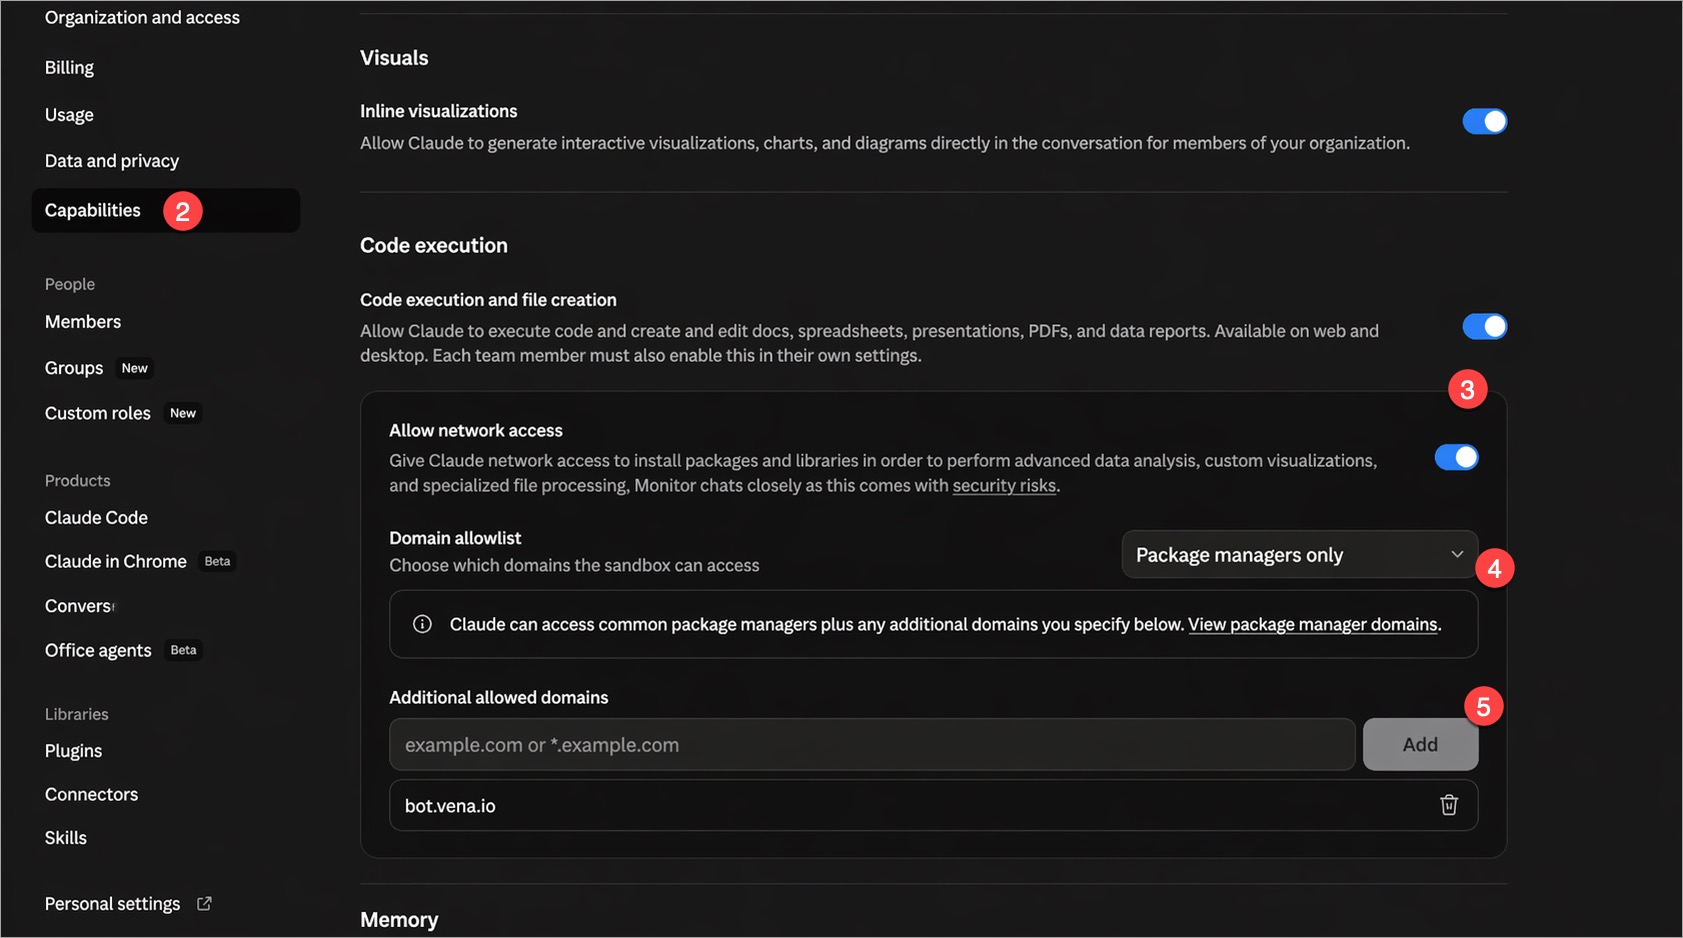
Use Connector (All Users)
Once the Vena MCP connector is created, users can access it by following these steps:
- Navigate to the Claude web interface.
- Select Customize, then Connectors.
- Select the + icon.
- Locate Vena MCP and select Connect. You will be redirected to a login page.
- Log in with your Vena credentials.
- Start a new chat and select Connectors to verify that the Vena connector is active.
- Begin your conversation.
ChatGPT
Create Connector (Admin or Owner Only)
If you are a ChatGPT Admin or Owner and applications at your organization are IT-managed, you can create and publish a connector for all users.
-
Navigate to the ChatGPT web interface.
-
Select your profile icon, then Workspace settings.
-
Select Apps.
-
Select Create.
-
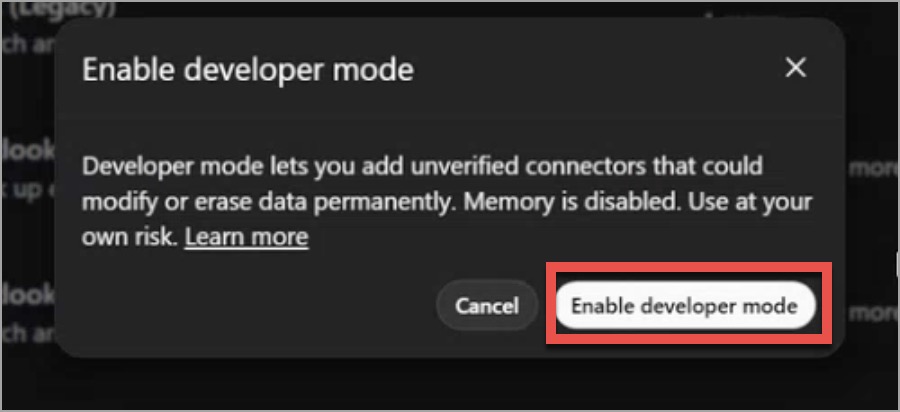
Select Enable developer mode.
-
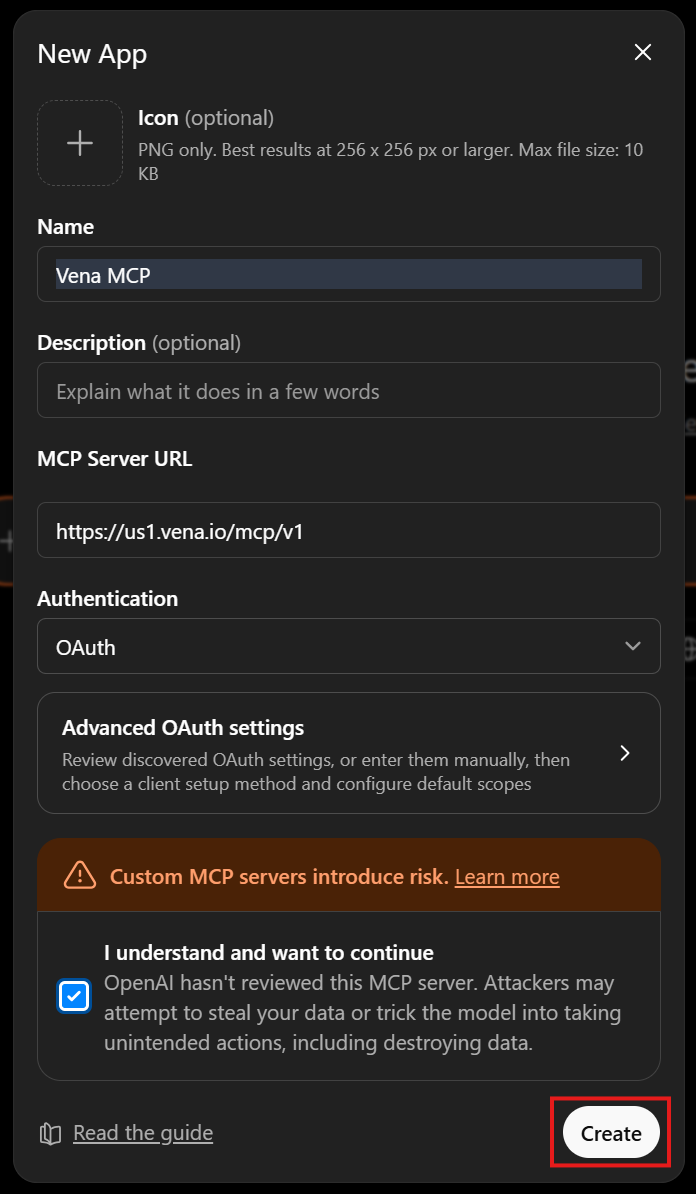
Enter a name for the connector.
-
Paste the Vena MCP Server URL in the field.
-
Select OAuth from the Authentication drop-down menu.
-
Check the box next to “I understand and want to continue”.
-
Select Create.
-
Once published, the Vena MCP connector appears in the Workspace’s approved connectors list and in users’ Apps & Connectors settings.
Use Connector (All Users)
- Start a new chat.
- Begin your conversation or Optionally you can:
- Select Add files & more, then More.
- Select the Vena MCP connector.
- ChatGPT will prompt you to Connect to the MCP, you will be redirected to a login page.
- Log in with your Vena credentials.
Microsoft Copilot
Create MCP Tool (Admin or Owner)
You must have permission to create or edit Agents in Copilot Studio.
-
Navigate to Copilot Studio.
-
Select Agents from the sidebar.
-
Select an existing Agent or select the create blank agent button.
-
In the Agent editor, select Tools, then Add a Tool.
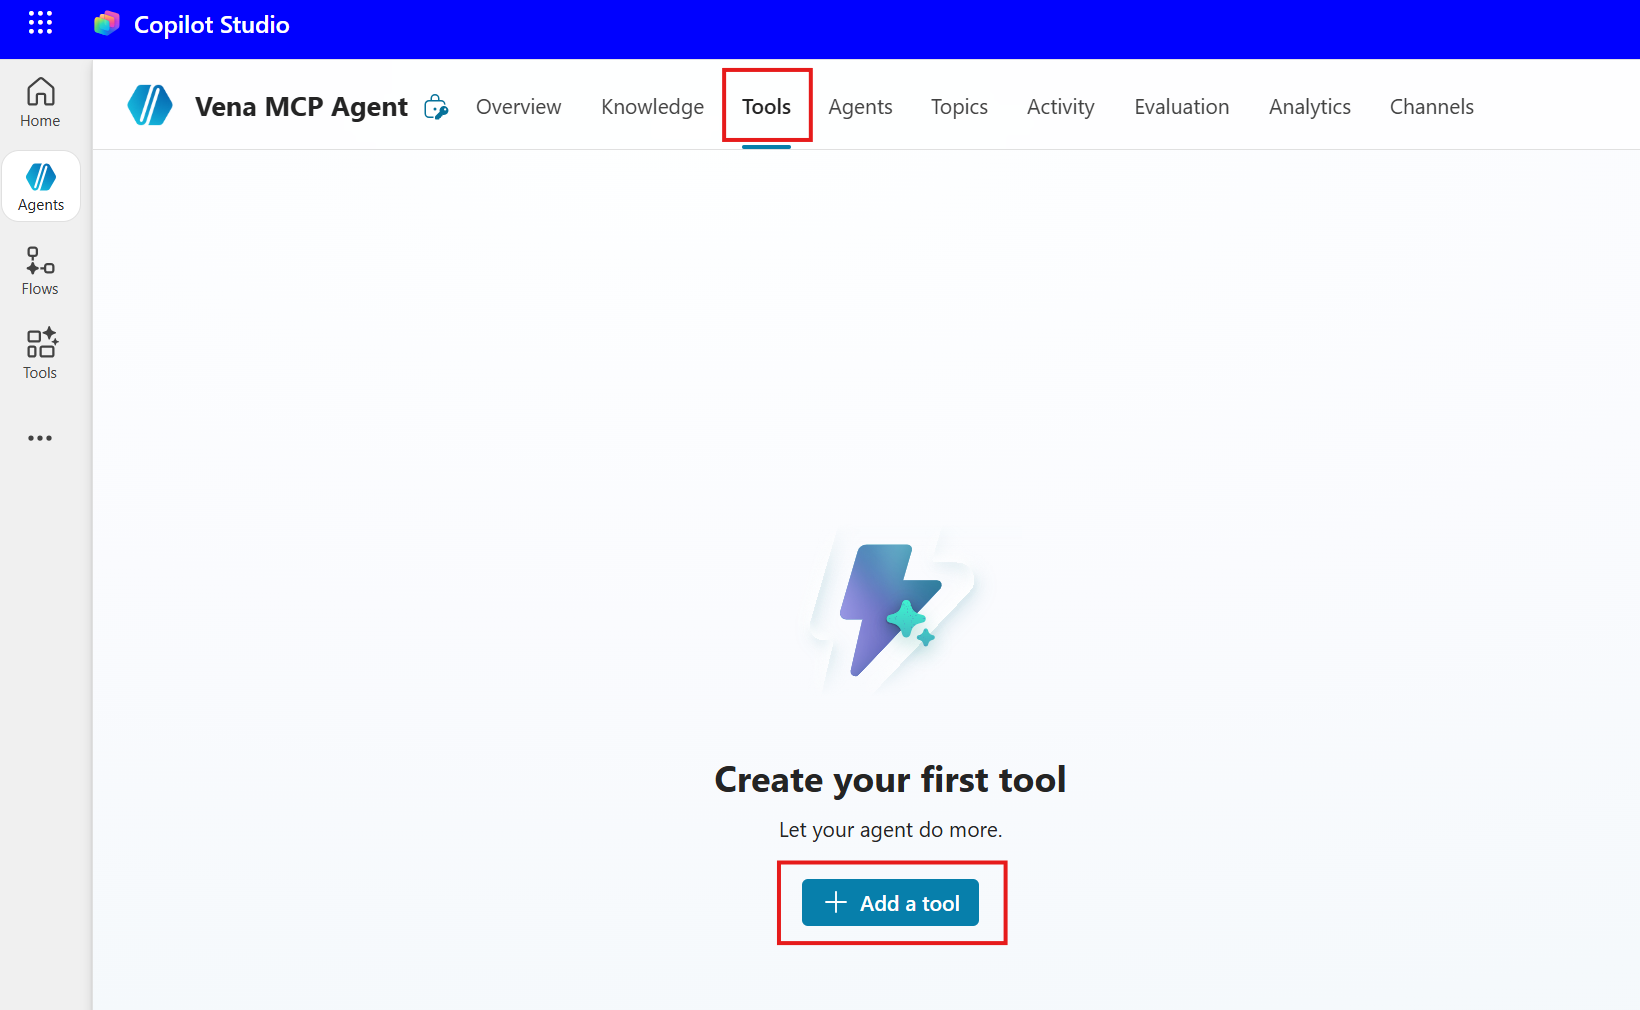
-
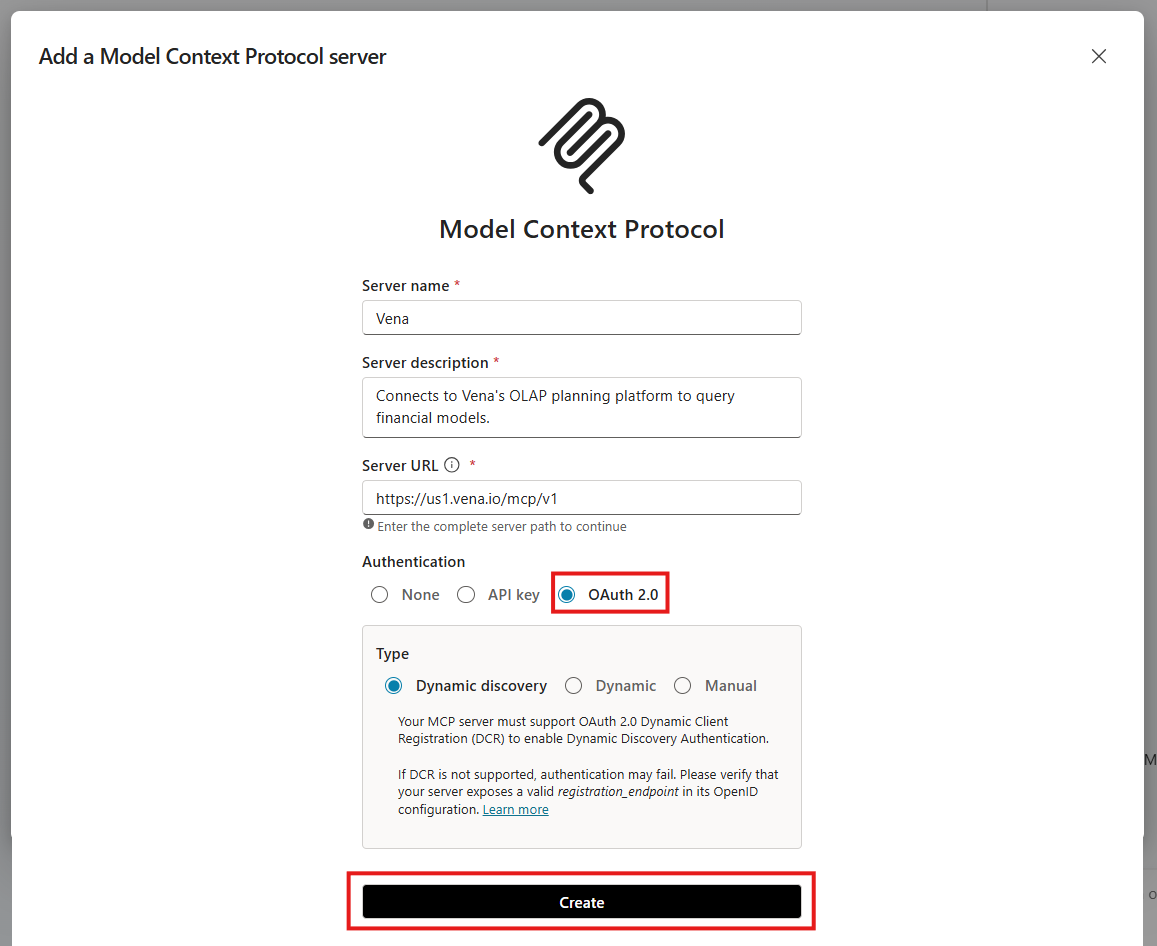
Select Model Context Protocol.
-
Enter a server name, description and the Vena MCP Server URL.
-
Under Authentication, select OAuth 2.0. Select Dynamic discovery as the type.
-
Select Create.
-
Select Create a new connection.
-
Next to Connection, select the drop-down menu and select Create new connection.
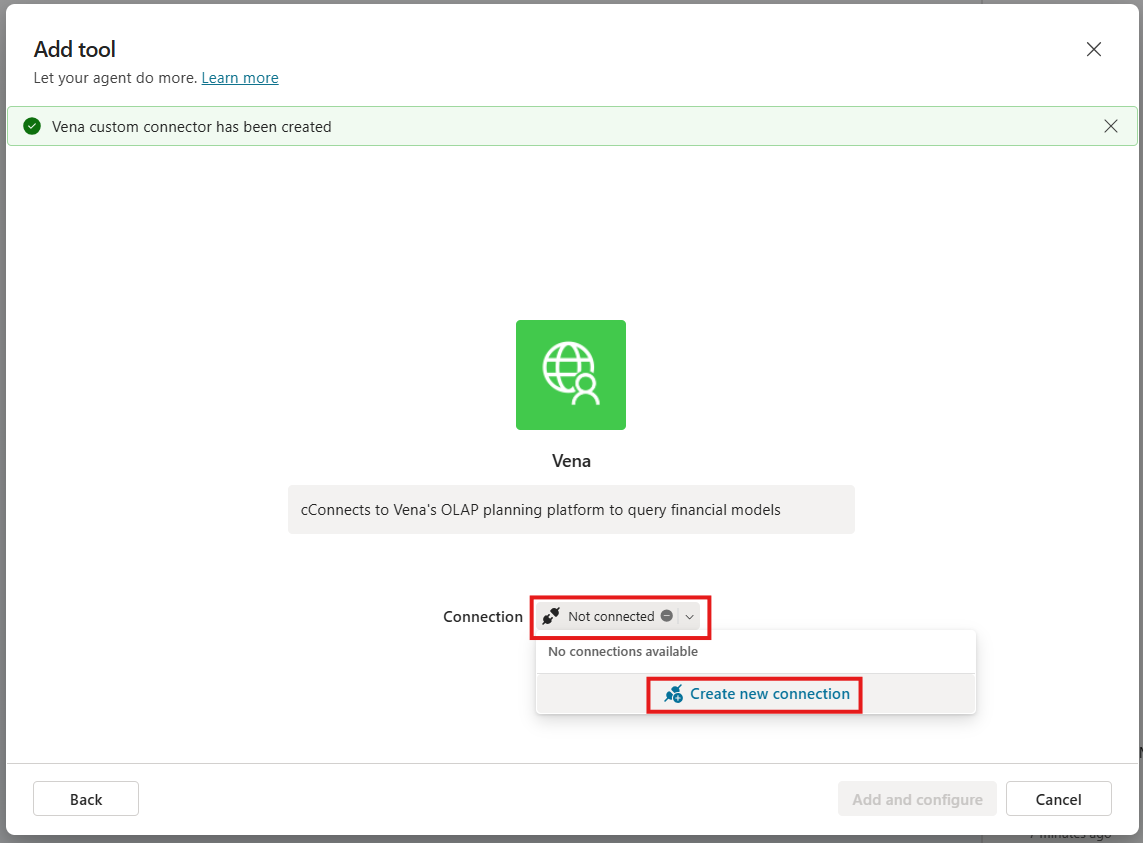
-
Select Add and configure.
-
Your Agent can now connect to Vena’s MCP Server.
-
Publish the Agent by following the steps in Microsoft's video.
Use MCP-Enabled Agent (All Users)
-
Once the Agent is published, submit a prompt.
-
Select Open connection manager.
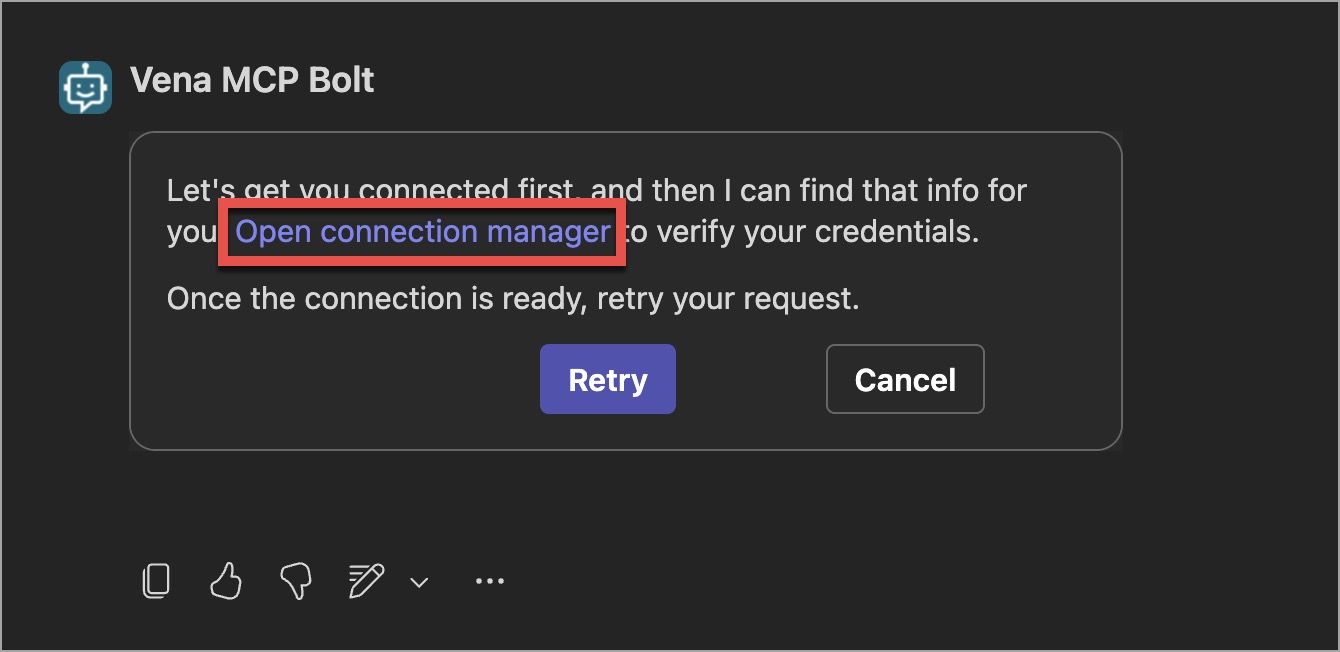
-
In the Manage your connections page, select Connect or Review.
-
Select the drop-down menu and select Create new connection.
-
Select Create, you will be redirected to a login page.
-
Log in with your Vena credentials.
-
Select Submit and return to the Chat view. Select Retry or enter a prompt.